

SMART Storage Saver — Prerequisites
Section titled “SMART Storage Saver — Prerequisites”To run SMART Storage Saver, you need an Azure Blob Storage account and a Microsoft Entra ID App Registration configured for SharePoint access.
1. Create an Azure Storage Account
Section titled “1. Create an Azure Storage Account”Create an Azure Storage account dedicated to SMART Storage Saver.
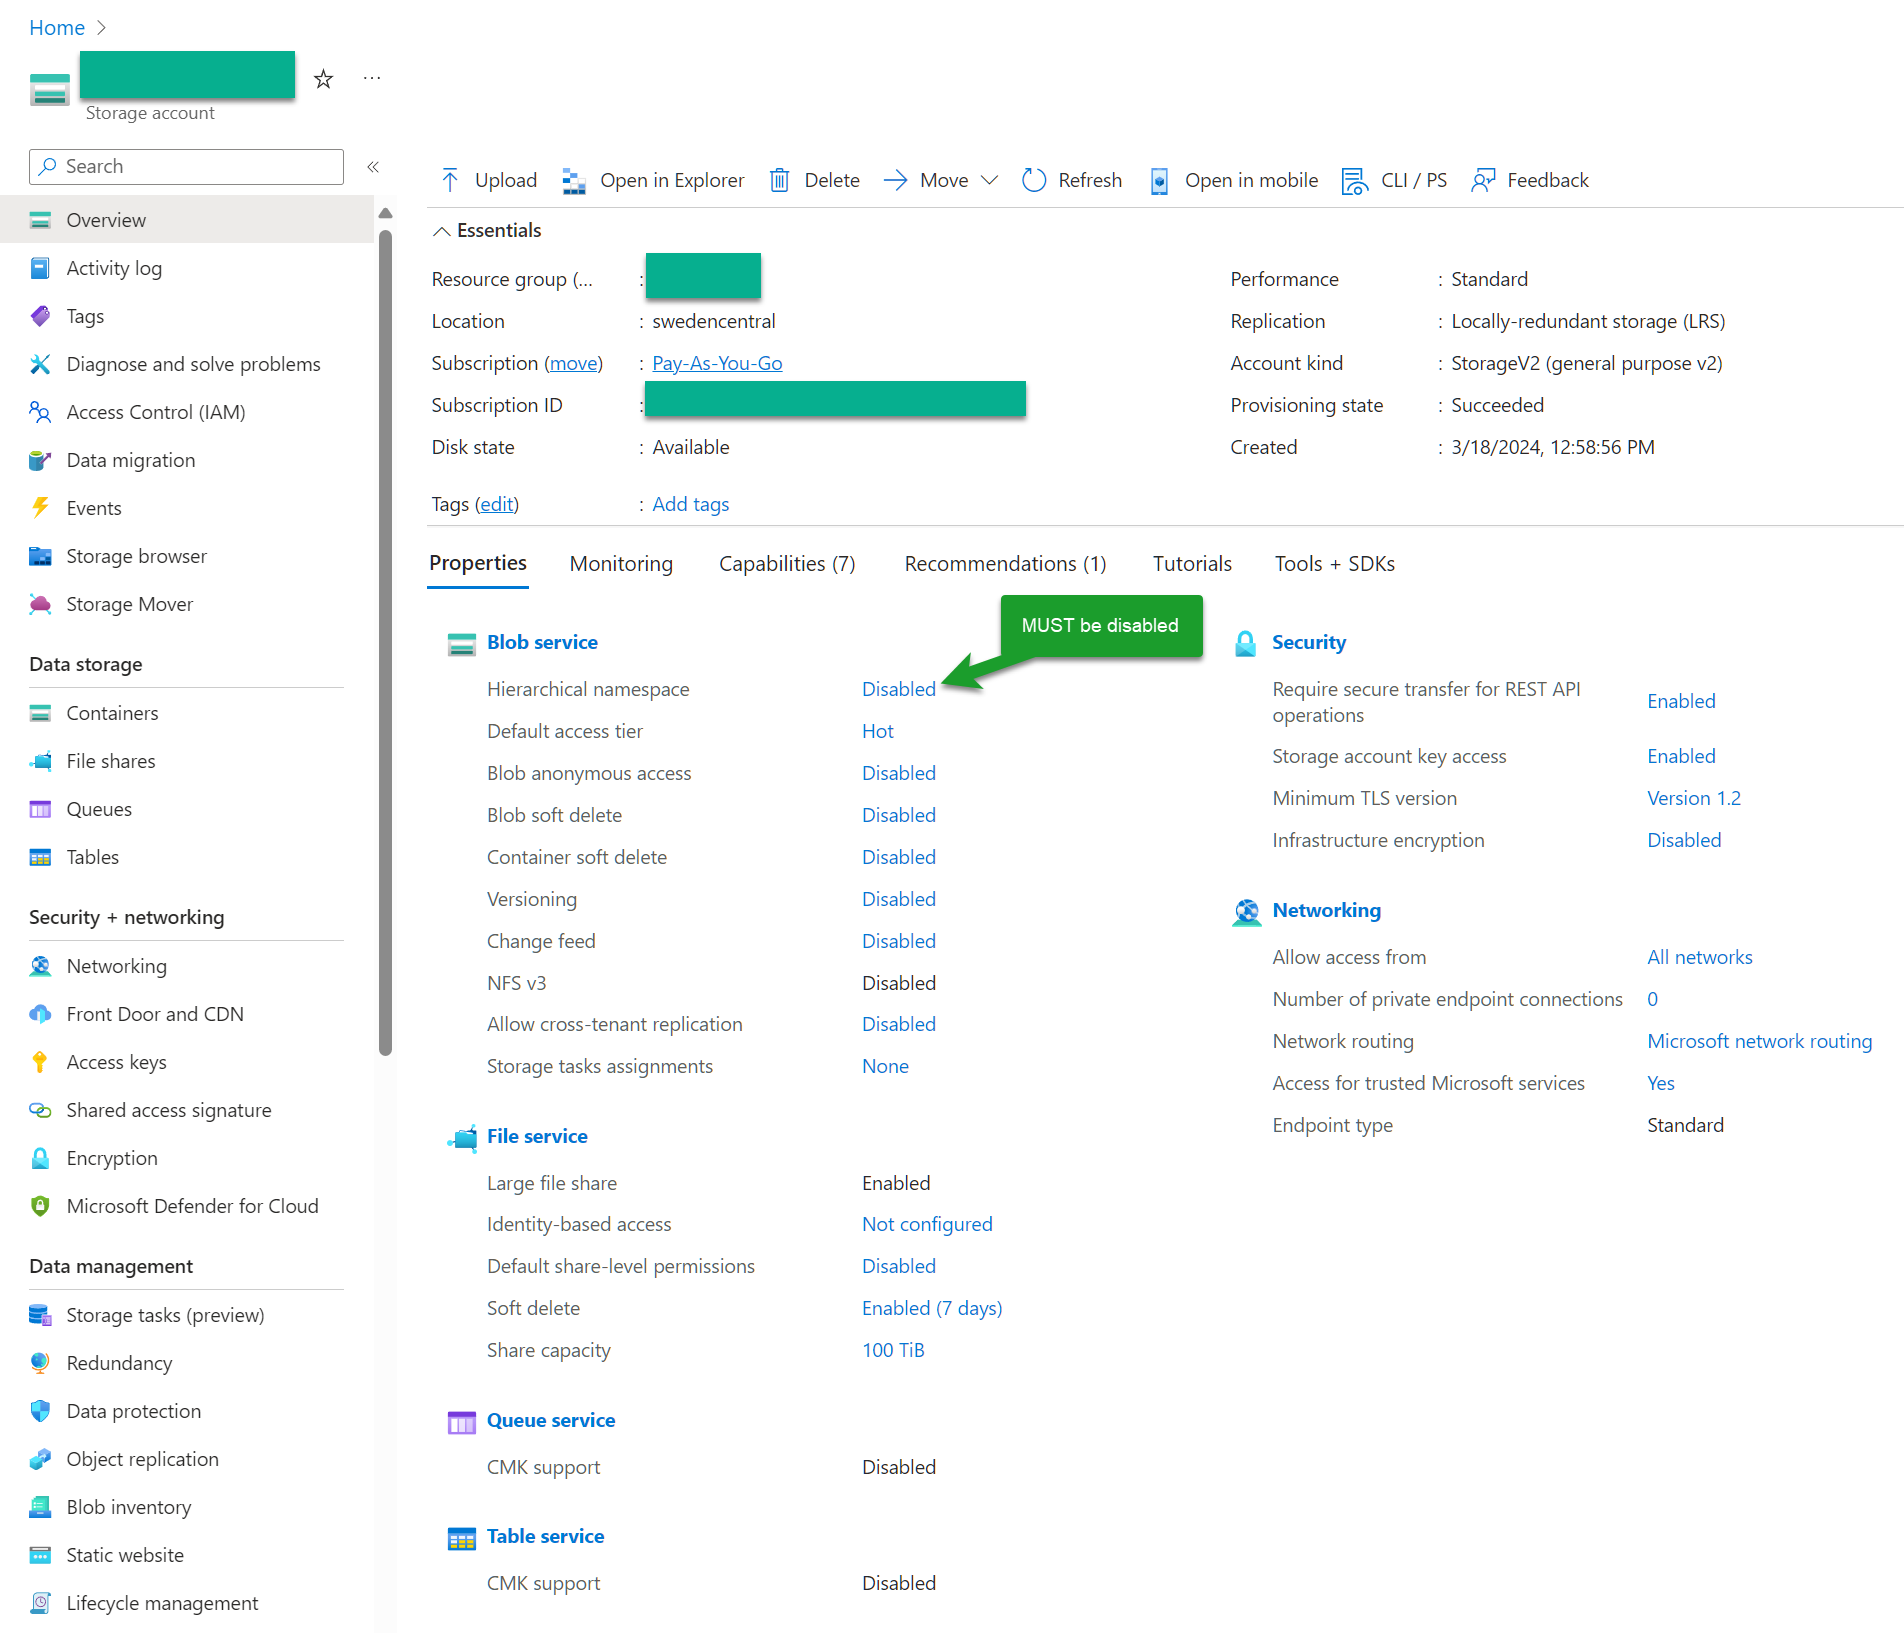
Keep hierarchical namespace disabled. Do not enable this option when creating the account.
2. Create the Storage Container
Section titled “2. Create the Storage Container”Inside the storage account, create one container with the following name:
smartmigration
Enter the name exactly as shown, using lowercase letters.

3. Generate a Shared Access Signature
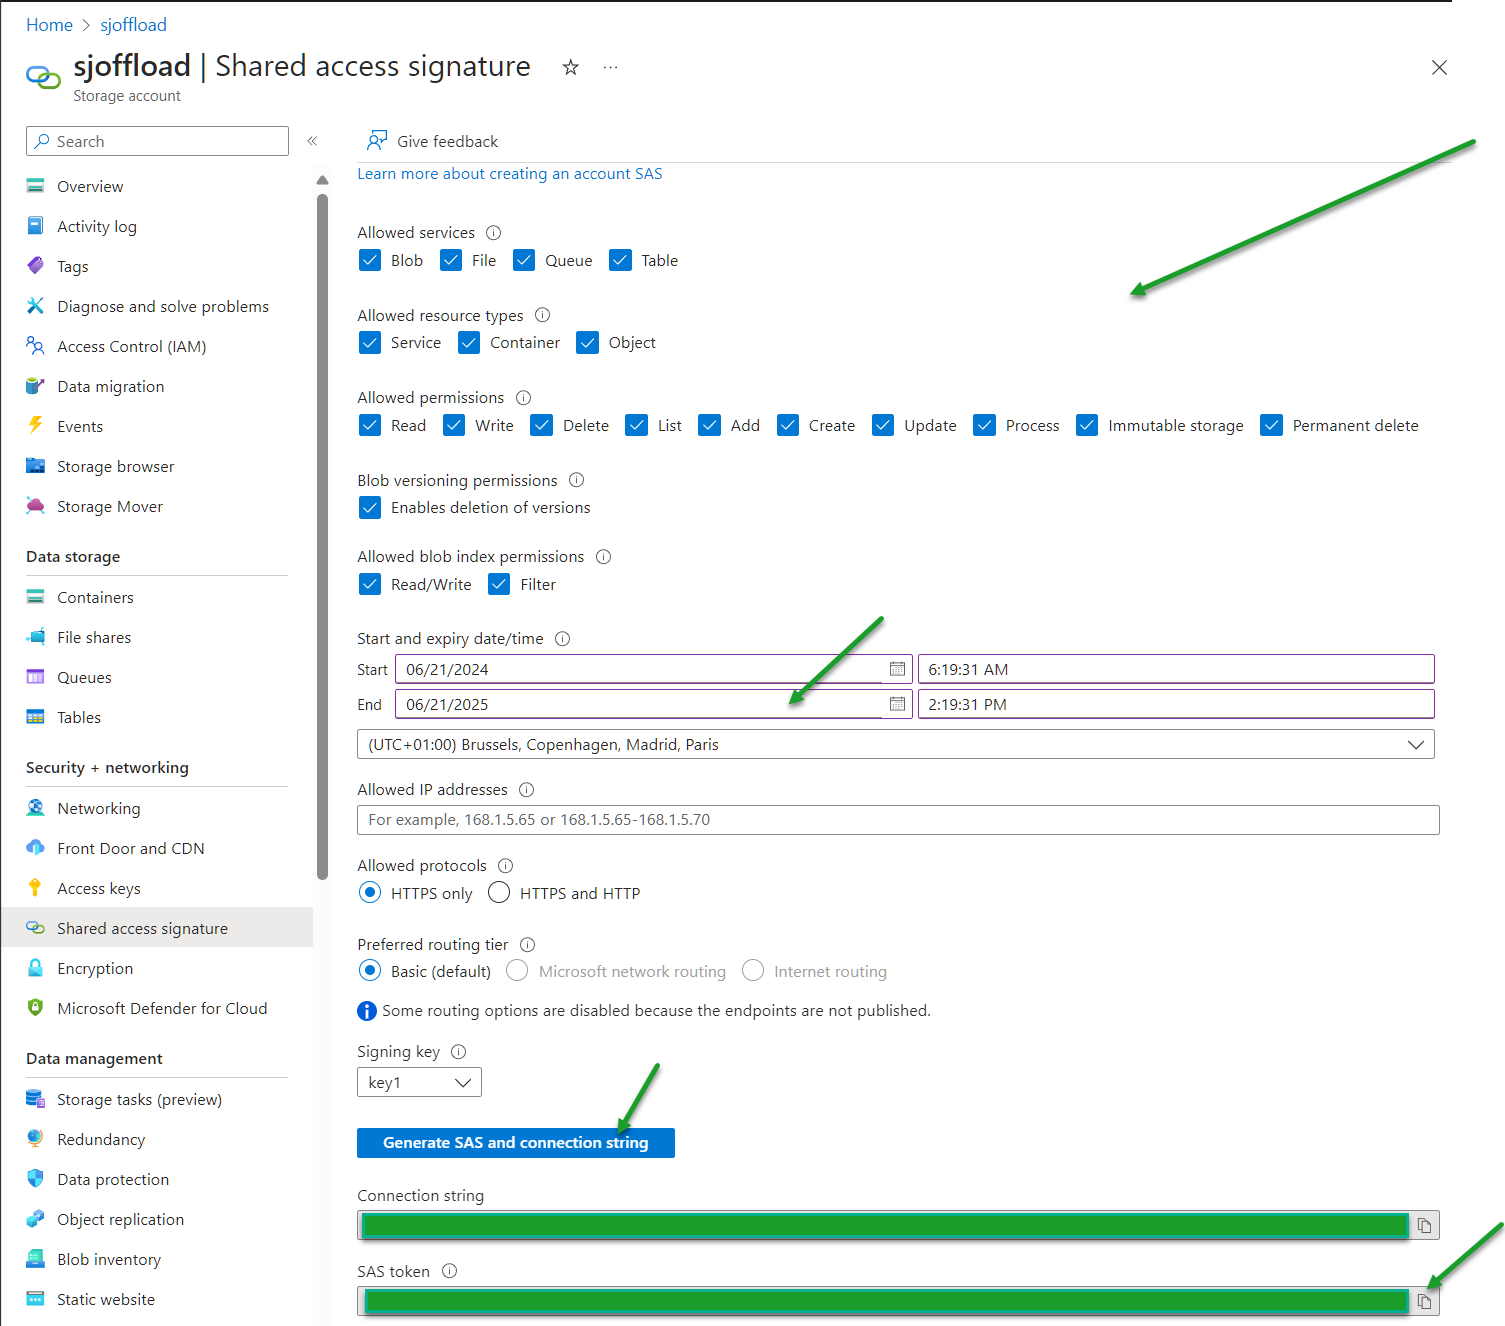
Section titled “3. Generate a Shared Access Signature”Create a Shared Access Signature, also known as a SAS token, for the storage account.
- Configure the settings and permissions shown in the screenshot below.
- Set an expiry date that covers your planned operations.
- Optionally restrict access to the public IP address of the machine connecting to the account.
- Click “Generate SAS and connection string”.
- Copy the value from the “SAS token” field and store it securely for use in SMART Storage Saver.
4. Configure SharePoint Access
Section titled “4. Configure SharePoint Access”Create and configure a Microsoft Entra ID App Registration to give SMART Storage Saver the required access to SharePoint.
Follow the step-by-step guide linked below to complete the registration and permission setup.
Create and Configure a Microsoft Entra ID App Registration
See also